- Knowledge Base
- Product Check Manager
- How To Record A Product Check
-
FAQs
-
Activation Process
-
One Pagers
-
Document Request Manager
-
Settings- Company Settings
-
Settings- Company Users Email & Security
-
Supply Chain Manager
-
Product Check Manager
-
Internal Document Manager
-
Production Models
-
Supplier Manager
-
Settings- Manage Products
-
Supplier Questionnaire Manager
-
Supplier Check Manager
-
Supplier Document Manager
- Tool Documentation
- Initial Setup of Supplier Document Manager
- Creating A Supplier Document Template
- Building The Document
- Approving The Document Internally Before Sending Out
- Delete Documents
- View Selected
- Sharing A Document With Suppliers To Sign Off
- Exceptions
- Sign Off Review
- Viewing A Customer Document
- Sign Off The Document
- Assign Responsibility
- Delete/Reject Selected
- Receiving & Viewing An Exception
-
Risk Assessment Manager
-
Incident Manager
- Tool Documentation
- Initial Setup
- Create Incident Forms – Supplier & Customer Confirmations
- Edit Incident Forms – Supplier & Customer Confirmations
- RASFF Notifications
- Create An Incident From The RASFF Notifications
- View Incident
- Edit Incident
- Share An Incident
- View Company Incident Shares
- View Responses From Supplier
- Request More Info
- Respond To Incident/Confirm/Close Out Incident
- Supplier Side Incident Manager
-
Remote Audit Manager
-
Specification Manager
- Tool Documentation
- Initial Setup For Specification Manager
- Creating Specification Templates
- Creating And Managing Company Specifications
- Creating and Managing Collaborative Specifications
- Creating and Managing Ingredient Specifications
- Sharing and Managing External Specifications
- Providing Customer Access To Linked Specifications
- Managing Specification Exceptions
- Viewing Specifications On The App
-
Customer Complaint Manager
-
Internal Check Manager
-
Workflow Manager
-
Stock Manager
-
Forecast Manager
-
Order Manager
-
Meeting Notes Manager
-
Customer Tool Guides
-
Traceability Manager
-
Supplier Audit Manager
- Tool Documentation
- Initial Setup
- Building A Custom Audit
- Using And Completing An Audit
- Update An Audit
- Request An Internal Review
- Mark Audit As Complete
- Notify Team Members
- Send PDF Report
- Export Full Audit Table To PDF
- Export Full Audit Table To Excel
- Recall Audit
- Reopen Audit
- Managing Activity Subscriptions
- Supplier Provided Audits
-
Purchasing & Sales Manager
-
Visit & Audit Schedule
-
Formbuilder
3.1.1 How To Bulk Import Product Checks
This function is used when there are a large number of Product Checks to be completed.
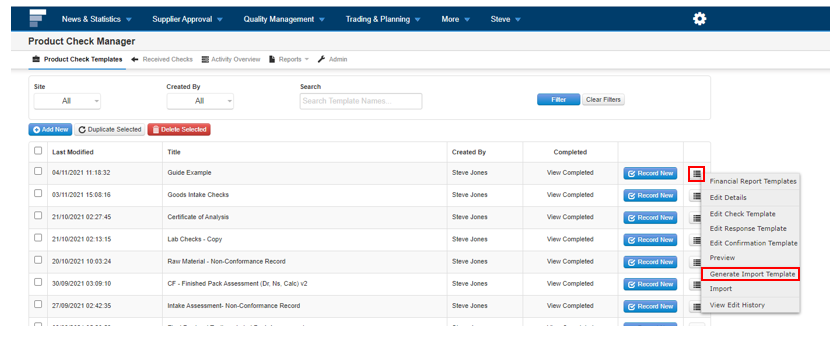
Step 1: After entering Product Check Manager (see 1. How to Access Product Check Manager) and finding which check needs completed, select the menu button beside that check and click Generate Import Template.

Step 2: The Import Template will be downloaded to your device – open the document. The document will look similar to the one pictured below. Click Enable Editing. Fill out each section as requested – each row will be a new check. Save the document.

Step 3: Return to Foods Connected and to the same page outlined in step 1. Click the menu and select Import.
Step 4: Click Choose File and select your document. Then click Import Forms.
Step 5: It will then show you which form values are valid. The valid forms will be signified with a green tick as shown below.

There is also a Valid and Invalid Form Count.
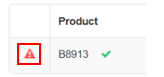
If any forms are invalid it will have a warning symbol. If the form is invalid, you can Edit it, as shown below.


Step 6: Once all forms are corrected (if necessary) and are valid, click Import Valid Forms.

The import is complete and is ready to be checked. If you are reviewing/approving the Product Checks, please see section 3.3 How to Approve a Product Check. If you wish to share the Product Check please see section 3.1.2. How to Share and Request More Information.


