- Knowledge Base
- Supply Chain Manager
- Creating A Supply Chain Template
-
FAQs
-
Activation Process
-
One Pagers
-
Document Request Manager
-
Settings- Company Settings
-
Settings- Company Users Email & Security
-
Supply Chain Manager
-
Product Check Manager
-
Internal Document Manager
-
Production Models
-
Supplier Manager
-
Settings- Manage Products
-
Supplier Questionnaire Manager
-
Supplier Check Manager
-
Supplier Document Manager
- Tool Documentation
- Initial Setup of Supplier Document Manager
- Creating A Supplier Document Template
- Building The Document
- Approving The Document Internally Before Sending Out
- Delete Documents
- View Selected
- Sharing A Document With Suppliers To Sign Off
- Exceptions
- Sign Off Review
- Viewing A Customer Document
- Sign Off The Document
- Assign Responsibility
- Delete/Reject Selected
- Receiving & Viewing An Exception
-
Risk Assessment Manager
-
Incident Manager
- Tool Documentation
- Initial Setup
- Create Incident Forms – Supplier & Customer Confirmations
- Edit Incident Forms – Supplier & Customer Confirmations
- RASFF Notifications
- Create An Incident From The RASFF Notifications
- View Incident
- Edit Incident
- Share An Incident
- View Company Incident Shares
- View Responses From Supplier
- Request More Info
- Respond To Incident/Confirm/Close Out Incident
- Supplier Side Incident Manager
-
Remote Audit Manager
-
Specification Manager
- Tool Documentation
- Initial Setup For Specification Manager
- Creating Specification Templates
- Creating And Managing Company Specifications
- Creating and Managing Collaborative Specifications
- Creating and Managing Ingredient Specifications
- Sharing and Managing External Specifications
- Providing Customer Access To Linked Specifications
- Managing Specification Exceptions
- Viewing Specifications On The App
-
Customer Complaint Manager
-
Internal Check Manager
-
Workflow Manager
-
Stock Manager
-
Forecast Manager
-
Order Manager
-
Meeting Notes Manager
-
Customer Tool Guides
-
Traceability Manager
-
Supplier Audit Manager
- Tool Documentation
- Initial Setup
- Building A Custom Audit
- Using And Completing An Audit
- Update An Audit
- Request An Internal Review
- Mark Audit As Complete
- Notify Team Members
- Send PDF Report
- Export Full Audit Table To PDF
- Export Full Audit Table To Excel
- Recall Audit
- Reopen Audit
- Managing Activity Subscriptions
- Supplier Provided Audits
-
Purchasing & Sales Manager
-
Visit & Audit Schedule
-
Formbuilder
1.2 Creating / Editing Supply Chain Template
Step 1: Select Add New Point to start creating supplier path points.
Step 2: Complete the detail for the supplier path point and press Save Details. Continue this process for all the supplier path points until complete.
NB. Selecting the supplier type and supplier sub type will limit the suppliers available in the supply chain to the suppliers categorised as the selected from supplier manager.
Step 3: If path points are in the wrong order, they can be rearranged by selecting the reorder points button and dragging the path points to the correct order. Once in the correct order press Done.
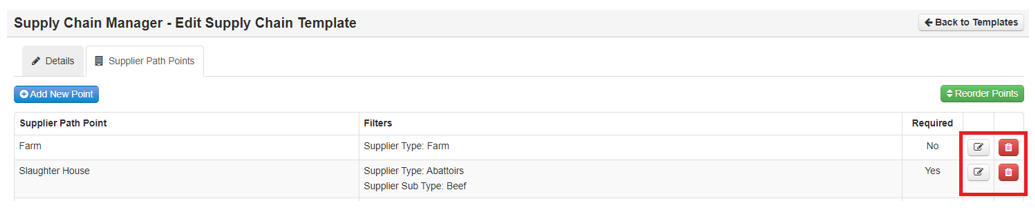
Step 4: Completed path points can be edited or deleted by selecting the edit icon or delete button on the right of the path point.
Step 5: Select the Details tab and change the status of the template to In Use and select Save & Exit.
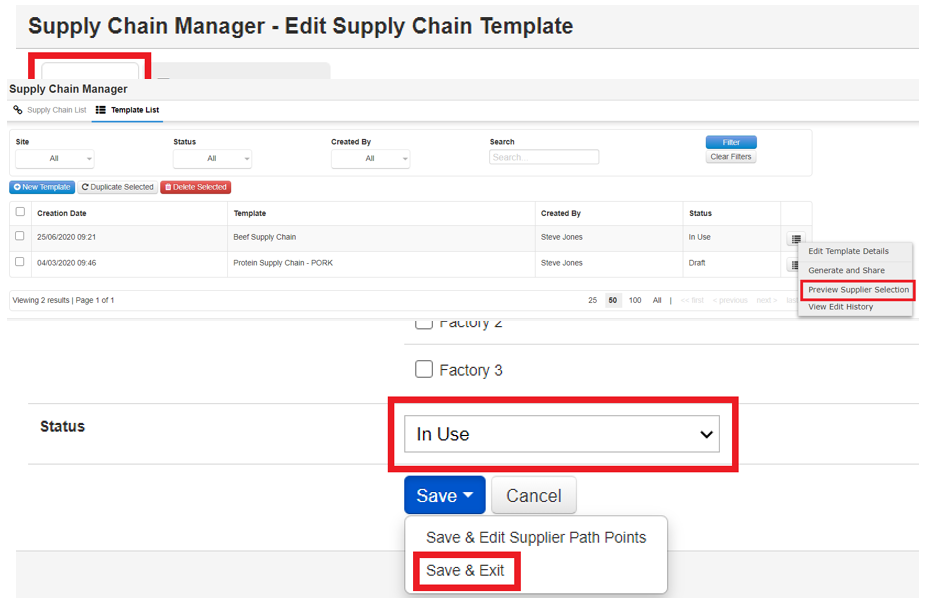
Step 6: Preview the template selection by clicking the icon button and selecting Preview Supplier Selection. This allows you to view what the person completing the supply chain will see and to ensure the correct suppliers fall into the correct path points.
If the path points are empty or the wrong suppliers are in the path point, then you need to edit the path point and select the corresponding filters for the relevant suppliers.


